How to Use The Mac OS X Hackers Toolbox
When you think of an operating system to run pen testing tools on, you probably think of Linux and more specifically BackTrack Linux. BackTrack Linux is a great option and one of the most common platforms for running pen testing tools. If you are a Mac user, then you would most likely run a virtual machine of BackTrack Linux.
While his is a great option, sometimes it is nice to have your tools running on the native operating system of your computer. Another benefit is to not having to share your system resources with a virtual machine. This also eliminates the need to transfer files between your operating system and a virtual machine, and the hassles of having to deal with a virtual machine. Also by running the tools within OS X, you will be able to seamlessly access all of your Mac OS X applications.
My attack laptop happens to be a MacBook Pro and I started out running VirtualBox with a BackTrack Linux virtual machine. I recently started installing my hacking tools on my MacBook Pro. I wanted to expand the toolset of my Mac, so I started with Nessus, nmap, SQLMap, and then I installed Metasploit. My goal is to get most if not all of the tools I use installed on my MacBook Pro and run them natively within OS X. Since Mac OS X is a UNIX based operating system, you get great tools that comes native within UNIX operating systems such as netcat and SSH. You also have powerful scripting languages installed such as Perl and Python. With all of the benefits and features of the Mac OS X, there is no reason to not use Mac OS X for your pen testing platform. I was really surprised to not see a lot of information on the subject of using Mac OS X as pen testing/hacking platform. Metasploit was the toughest application to get running on Mac OS X and that was mostly due to the PostgreSQL database setup. The majority of hacking tools are command line based, so they are easy and are fairly straight forward to install.
In this article I am going to take you through installing and configuring some of the most popular and useful hacking tools such as Metasploit on Mac OS X. If you are interested in maximizing the use of your Mac for pen testing and running your tools natively, then you should find this article helpful.
The Tools
The pen test tools we will be installing is a must have set of tools and all of them are free, with the exception of Burp Suite and Nessus. Although Burb Suite has a free version, which offers a portion of the Burp Suite tools for free. The tools offered for free with Burp Suite are useful tools and I highly recommend them. The professional version of Burp Suite is reasonably priced.
• Metasploit Framework
• Nmap
• SQLmap
• Burp Suite
• Nessus
• SSLScan
• Wireshark
• TCPDUMP
• Netcat
Metasploit Framework
The Metasploit Framework is one of the most popular and powerful exploit tools for pen testers and a must have for pen testers. The Metasploit Framework simplifies the exploitation process and allows you to manage your pen tests with the workspace function in Metasploit. Metasploit also allows you to run nmap within Metasploit and the scan information is organized by project with the workspace function. You can create your own exploits and modify existing exploits in Metasploit. Metasploit has many more features and too many to mention in this article, plus the scope of this article is demonstrate how to install Metasploit and other pen testing tools.
The Install
Before we install Metasploit, we need to install some software dependencies. It is a little more work to install Metasploit on Mac OS X, but it will be worth it. Listed below are the prerequisite software packages.
Software Prerequisites
• MacPorts
• Ruby1.9.3
• Homebrew
• PostreSQL
MacPorts Installation
Install Xcode
• Xcode Install from the Apple App Store, or it can be downloaded from the following URL; https://developer.apple.com/xcode/
• Once Xcode is installed go into the Xcode preferences and install the “Command Line Tools”. (see Figure 1)
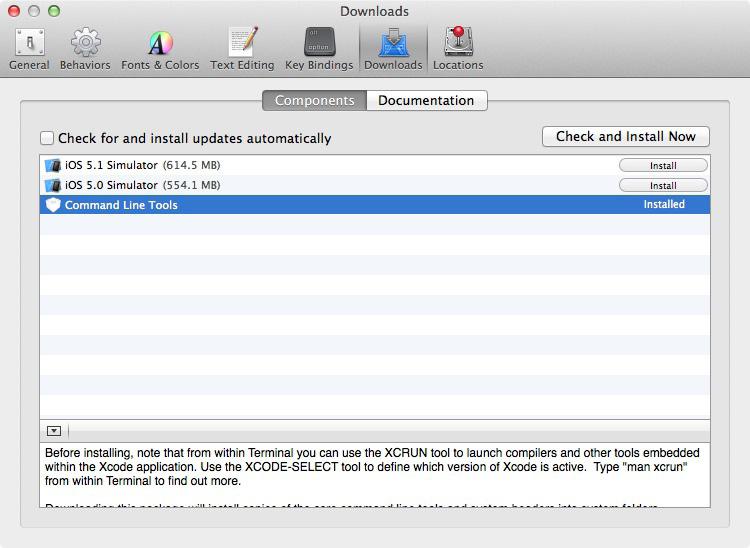
Figure 1. Install “Command Line Tools”
Install the MacPorts app
• Download and install the package file (.dmg) file from the MacPorts web site; https://distfiles.macports.org/MacPorts/
Once the files is downloaded install MacPorts.
More information on MacPorts can be found here: http://www.macports.org/install.php
• Run MacPorts selfupdate to make sure it is using the latest version.
From a terminal window run the following command:
$ sudo port selfupdate
Ruby 1.9.3
Mac OS X is preinstalled with Ruby, but we want to upgrade to Ruby 1.9.3
• We will be using MacPorts to upgrade Ruby.
From a terminal window run the following command:
$ sudo port install ruby19 +nosuffix
• The default Ruby install path for MacPorts is: /opt/local/
It’s a good idea to verify that the PATH is correct, so that opt/local/bin is listed before /usr/bin. You should get back something that looks like this:
/opt/local/bin:/opt/local/sbin:/usr/bin:/bin:/usr/sbin:/sbin
You can verify the path by entering the following syntax in a terminal window:
$ echo $PATH
To verify the Ruby install locations, enter this syntax:
$ which ruby gem
You should get back the following response:
/opt/local/bin/ruby
/opt/local/bin/gem
Database Installation
A database is not required to run, but some of the features of Metasploit require that you install a database. The workspace feature of Metasploit is one of the really nice features of Metasploit that requires a database. Workspace allows easy project organization by offering separate workspaces for each project. PostgreSQL is the vendor recommended and supported database, but MySQL can be used. In this article, we will be using PostgreSQL.
We will use Homebrew to install PostgreSQL. I tried a few different installation methods, but this is the easiest way to install PostgreSQL. Homebrew is good method to install Open Source software packages.
• First we will install Homebrew.
From a terminal window run the following command:
$ ruby -e “$(curl -fsSkL raw.github.com/mxcl/homebrew/go)”
• Next we will install PostgreSQL using Homebrew.
From a terminal window run the following command:
$ brew install postgresql
• Next we initialize the database, configure the startup, and start PostgreSQL.
From a terminal window run the following command:
initdb /usr/local/var/postgres cp /usr/
local/Cellar/postgresql/9.1.4/homebrew.mxcl.
postgresql.plist ~/Library/LaunchAgents/
launchctl load -w ~/Library/LaunchAgents/
homebrew.mxcl.postgresql.plist pg_ctl -D /
usr/local/var/postgres -l /usr/local/var/
postgres/server.log start
• Database configuration
In this step we will create our Metasploit database and the database user.
• The Homebrew install does not create the posgres user, so we need to create the postgres user to create databases and database users.
At a command prompt, type the following:
$ createuser postgres_user -P
$ Enter password for new role: password
$ Enter it again: password
$ Shall the new role be a superuser? (y/n) y
$ Shall the new role be allowed to create databases? (y/n) y
$ Shall the new role be allowed to create more new roles? (y/n) y
• Creating the database user
At a command prompt, type the following:
$ createuser msf_user -P
$ Enter password for new role: password
$ Enter it again: password
$ Shall the new role be a superuser? (y/n) n
$ Shall the new role be allowed to create databases? (y/n) n
$ Shall the new role be allowed to create more new roles? (y/n) n
• Creating the database
At a command prompt, type the following:
$ createdb --owner=msf_user msf_database
• Install the pg gem.
At a command prompt, type the following:
$ gem install pg
The database and database user are created, so now it is time to install Metasploit.
Metasploit software installation
The dependencies have been installed and next we will be installing the Metasploit software.
• Download the Metsploit source code for installation using the link provided below and do not download the .run file from the Metasploit download page. Download the Metasploit tar file from: http://downloads.metasploit.com/data/releases/framework-latest.tar.bz2.
• Once the download is complete, untar the file. If you have software installed to unzip or untar files, then it should untar the file when the file is finished downloading. I use StuffIt Expander and it untarred the file for me upon completion of the download. If you need to manually untar the file, type this command at the command line and it will untar the file into the desired directory:
$ sudo tar –xvf framework-lastest-tar.bz2 –C /opt
If the file was untarred for you as mentioned, you will need to move the Metasploit source file structure to the opt directory. Your directory structure should look like this:
/opt/metasploit3/msf3
Starting Metasploit
Now that Metasploit is installed, we will start Metasploit for the first time. You will need to navigate to the Metasploit directory and start Metasploit.
• Navigate to the Metaploit directory with the following syntax entered at the command line:
$ cd /opt/metasploit/msf3
• To start Metasploit, simply enter the following syntax:
$ sudo ./msfconsole
You will get one of the many Metasploit screens like the one in Figure 2.
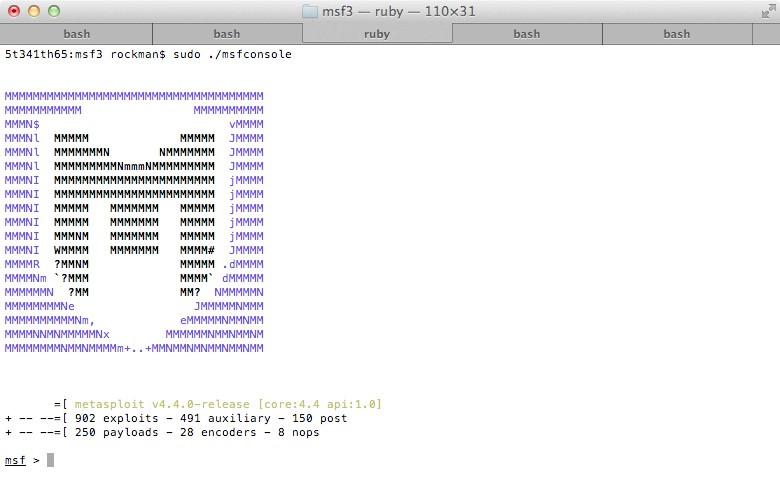
Figure 2. This is one of the many Metasploit screens you will see when launching Metasploit
Connecting to the database
In this next step we will connect Metasploit to our PostgreSQL data base. From the Metasploit prompt, type the following syntax:
msf > db_connect msf_user:password@127.0.0.1/msf_database
You will see the following message and you should be connected.
[*] Rebuilding the module cache in the background…
Type in the following syntax to verify the database is connected:
msf > db_status
You will get the following back verifying the database is connected:
[*] postgresql connected to msf_database
The database is now connected to Metasploit, but once you exit Metasploit the database will be disconnected. To configure Metasploit to automatically connect on startup, we will have to create the msfconsole.rc file.
Enter the following syntax at the command prompt:
$ cat > ~/.msf3/msfconsole.rc << EOF db_connect
-y /opt/metasploit3/config/database.yml
EOF
Updating Metasploit
Now that we have Metasploit installed and configured, we will update the Metasploit installation. From the command prompt, type the following syntax:
$ ./msfupdate
This can take a while, so just set back and let the update complete. Make sure to update Metasploit frequently so you have the latest exploits.
The benefits of Metasploit with database
Metasploit is installed, the database is connected and ready to use. So what can I do with Metasploit with a database that I couldn’t do without one? Here is a list of the new functionality gained by using a database with Metaploit.
Here is a list of the Metasploit Database Backend Commands taken directly from the Metasploit console: Listing 1.
Listing 1. Database Backend Commands as displayed in the Metasploit console
Database Backend Commands
=========================
Command Description
——- ———–
creds List all credentials in the database
db_connect Connect to an existing database
db_disconnect Disconnect from the current database instance
db_export Export a file containing the contents of the database
db_import Import a scan result file (filetype will be auto-detected)
db_nmap Executes nmap and records the output automatically
db_rebuild_cache Rebuilds the database-stored module cache
db_status Show the current database status
hosts List all hosts in the database
loot List all loot in the database
notes List all notes in the database
services List all services in the database
vulns List all vulnerabilities in the database
workspace Switch between database workspaces
The commands are pretty much self-explanatory, but to it should be noted that db_import allows you to import nmap scans done outside of Metasploit. This comes in handy when you are working with others on a pen test and you want to centrally manage your pen test data. As mentioned earlier, workspace helps you manage your pen tests by allowing you to store them in separate areas of the database.
A great reference guide for Metasploit can be found at Offensive Security’s website: http://www.offensive-security.com/metasploit-unleashed/Main_Page.
Nmap
Nmap is an open source network discovery and security auditing tool. You can run nmap within Metasploit, but it is good to have nmap installed so you can run nmap outside of Metasploit.
We will use Homebrew to install nmap. From the command prompt, type the following syntax:
$ brew install nmap
Visit the Nmap website for the Nmap reference guide: http://nmap.org/book/man.html.
SQLmap
SQLmap is a penetration testing tool that detects SQL injection flaws and automates SQL injection. From the command prompt, type the following syntax:
$ git clone https://github.com/sqlmapproject/sqlmap.git sqlmap-dev
Burp Suite
Burp Suite is a set of web security testing tools, including Burp Proxy. To install Burp Suite, download it from: http://www.portswigger.net/burp/download.html
To run Burp, type the following syntax from the command prompt:
$ java -jar -Xmx1024m burpsuite_v1.4.01.jar
For more information on using Burp, go to the Burp Suite website: http://www.portswigger.net/burp/help/.
Nessus
Nessus is a commercial vulnerability scanner and it can be downloaded from the Tenable Network website: http://www.tenable.com/products/nessus/nessus-download-agreement.
Download the file Nessus-5.x.x.dmg.gz, and then double click on it to unzip it. Double click on the Nessus-5.x.x.dmg file, which will mount the disk image and make it appear under “Devices” in “Finder”. Once the volume “Nessus 5” appears in “Finder”, double click on the file Nessus 5.
The Nessus installer is GUI based like other Mac OS X applications, so there are no special instructions to document. The Nessus 5.0 Installation and Configuration Guide as well as the Nessus 5.0 User Guide can be downloaded from the documentation section of the Tenable Network website: http://www.tenable.com/products/nessus/documentation.
SSLScan
SSLScan queries SSL services, such as HTTPS, in order to determine the ciphers that are supported.
To install sslscan, type the following syntax at the command prompt:
$ brew install sslscan
Wireshark
Wireshark is a packet analyzer and can be useful in pen tests.
Wireshark DMG package can be downloaded from the Wireshark website: http://www.wireshark.org/download.html.
Once the file is downloaded, double click to install Wireshark.
TCPDUMP
TCPDUMP is a command line packet analyzer that is preinstalled on Mac OS X. For more information consult the man page for tcpdump, by typing the following syntax at the command prompt:
$ man tcpdump
Netcat
Netcat is a multipurpose network utility that is preinstalled on Mac OS X. Netcat can be used for port redirection, tunneling, and port scanning to just name a few of the capabilities of netcat. Netcat is used a lot for reverse shells. For more information on netcat, type the following syntax at the command prompt:
$ man nc
Conclusion
Follow the instructions in this article, you will have a fully functional set of hacking tools installed on your Mac and you will be able to run them natively without having to start a virtual machine or deal with the added administrative overhead that comes with running a virtual machine. You will also not have to share resources with a virtual machine. I hope you found this article useful and I hope you enjoy setting up your Mac OS X hacker toolbox as much as I did. With Macs gaining popularity, I can only imagine they will become more widely used in pen testing
No comments:
Post a Comment